
A focused guide to choosing how far to walk at Fushimi Inari, allowing for the descent and visiting a working shrine respectfully.
Fushimi Inari works best when you decide what would make the visit complete before starting uphill. Seeing the main shrine and walking beneath the lower torii is a worthwhile visit in its own right. Continuing onto Mount Inari gives you a longer walk among worship sites, with more climbing and a return journey that deserves its own time.
Choose the shorter version if your main interest is the shrine architecture and gates, or if you have limited stamina. Choose the mountain version because you want to walk, rather than because a summit feels compulsory. For the wider choice between this shrine and other districts, see our guide to things to do in Kyoto.
| Visit | Editorial time allowance on site | Main reward | Decision to make |
|---|---|---|---|
| Main precinct and lower torii | 60–90 minutes | Shrine buildings and the gate-lined approach | Turn back before the climb becomes the outing |
| Lower shrine plus an extended ascent | 90–150 minutes | More walking with a flexible turnaround | Reserve enough energy and daylight for the descent |
| Substantial mountain circuit | 2–3 hours or longer | A sustained walk among mountain worship sites | Give the outing room in your day |
These are planning allowances, excluding transport, long queues and a meal. They are not measured completion times or accessible-route guarantees. Visitor information was checked on 16 October 2026.
Understand the shrine before choosing a route
The shrine's introduction makes an important distinction: the sacred precinct extends onto the mountain. The famous gates are part of a place of worship, rather than an isolated photographic installation. Your route should therefore allow people to pray and pass, including when you stop to look around.
Use the official precinct map to recognise Romon, Honden, Senbon Torii and Okusha Hohaisho before setting out. Learning those names is more useful than saving an arbitrary number of gates to photograph. They give you recognisable stages and a way to explain where you are if your group separates.
Begin with the main precinct rather than immediately following the largest stream of people uphill. Look at the buildings from permitted areas, notice the relationship between the entrance and the worship spaces, and establish where the torii route begins. You can then make a deliberate transition from a shrine visit to a walk.
The route need not become longer simply because the next stretch is visible. Agree on an initial turnaround with your companions and reconsider it together. A person comfortable with level city walking may feel differently once repeated steps and the descent become part of the same outing.
The lower visit: make it a complete experience
For a compact visit, focus on the main precinct and the lower gate-lined approach, with Okusha Hohaisho as a possible point to reassess. Follow the current signs and any staff directions rather than relying on a saved photograph of a path junction. If the route is uncomfortable or crowded, turn back sooner.
This version suits visitors who want to understand the setting without devoting a morning to climbing. Spend your attention on differences in scale: the main buildings, the enclosing rows of gates, and the smaller spaces where people stop to worship. You do not need a long historical lecture to notice how the experience changes between these places.
Avoid budgeting the whole allowance for the outward walk. Leave room to return through busy stretches, retrieve anything stored elsewhere and reach your departure station. If you have a reservation later, calculate backwards from that commitment before extending the walk. Time saved by a short railway journey does not automatically become spare climbing time.
A lower visit also gives a mixed-energy group a sensible common plan. Complete that portion together, then split only if everyone is comfortable with the arrangement. Choose a clear meeting location and a return deadline; do not assume mobile reception, battery life or identical walking speeds will solve the coordination for you.
The mountain: choose the walking, not a summit photograph
The shrine describes Inariyama as a sacred mountain with paths, peaks and worship stones. Its summit elevation is 233 metres above sea level; this is not the amount of climbing from the entrance. A map's summit label also does not promise a panoramic viewpoint.
Choose the longer route if the act of walking through that setting is what interests you. Repeated gateways and small sacred sites reward attention, but the experience will not appeal equally to someone who mainly wants a brief encounter with the famous lower passage. Neither preference makes the visit less valid.
At junctions, pause out of the flow, read the signs and check your intended direction. Do not interpret every side path as an alternative shortcut back to the station. Keeping the return route understandable is especially useful when you are tired, when rain starts or when different members of your group want to descend.
JNTO's Fushimi Inari overview describes a mountain outing lasting roughly 2–3 hours. Use that as a broad reference, not a target to beat. Stops, photographs, heat and your chosen circuit can lengthen it. If your schedule has no room for a slower return, select the lower route from the beginning.
Before continuing beyond your initial turnaround, ask concrete questions: are everyone’s legs comfortable, is there enough drinking water, is the route clear, and is the return still possible without rushing? If the answer changes, descending is a successful adjustment. Continuing solely because you have already climbed partway is a poor reason to spend the rest of the day exhausted.
Arrive at the station that fits your starting point
The official access page identifies JR Inari on the Nara Line beside the shrine and Keihan Fushimi-inari a short walk away. These are different stations. Save the full name and operator in your route planner, and confirm that the train you board stops there.
From accommodation near Kyoto Station, the JR option is a natural route to compare first. From an address near the Keihan line, compare the journey to Fushimi-inari instead of automatically returning to Kyoto Station. The best choice depends on your actual starting address and onward destination, not the shrine’s popularity.
Keep rail travel, station navigation and the shrine visit as separate pieces of the schedule. A quoted train running time excludes waiting, getting to the platform and walking from your hotel. Check the current fare and service for your journey rather than assuming a pass covers every operator.
After the walk, returning through the same station can simplify the day. A different departure station can make sense if you are continuing elsewhere, but decide that with a current route planner. Do not turn tired wandering around the station approaches into an improvised transport strategy.
Steps, weather and access needs
The lower route and the mountain route should not share a blanket “easy” label. A short visit can still involve steps, slopes and busy passages. For a wheelchair, walking aid or stroller, ask the shrine about the exact portion you want to reach and the current approach before relying on a generic attraction listing.
With a stroller, decide how you would manage a route that becomes impractical before entering it. Carrying both a child and equipment while leaving room for others may change your judgement about continuing. A useful visit might concentrate on the main precinct; there is no obligation to make the whole party complete the same ascent.
Wear shoes you trust on steps and bring weather-appropriate clothing. In rain, shorten the route if footing becomes uncomfortable. In heat, reduce the climb and include a proper rest. These are practical planning choices, not claims that a particular route will be safe in every condition.
For an unfamiliar mountain walk, daylight makes signs and footing easier to assess. Do not confuse the ability to reach shrine grounds with staffed services, open shops or unrestricted access to every path at every hour. Check current notices if you are considering an unusual arrival time, and keep an easier alternative available.
Photography and breaks without obstructing worship
Read the shrine's visitor requests before you arrive. They prohibit obstructive photography on narrow paths, drones, entry into restricted areas and feeding wildlife. Eating and drinking belong in designated areas. Follow the signs where you are standing, including any photography restrictions.
For photographs beneath the torii, move with the path’s flow and take a brief opportunity when it appears. Do not ask other visitors or worshippers to wait while you stage an empty scene. If a composition requires blocking the passage, choose another photograph. A quieter-looking image is not worth making the actual visit difficult for everyone around you.
Plan a meal separately from the climb. Check a business's opening and menu when you reach it; do not depend on a particular mountain stall being available when you need a break. Carry rubbish away and use appropriate rest spaces. Looking after these small details lets you concentrate on the setting rather than improvising when tired.
Fit the walk into the rest of Kyoto
After a lower visit, a central lunch and a gentle afternoon can work well. After a substantial mountain outing, preserve the same lunch break but reduce the afternoon's walking. The extra effort should replace another demand, rather than simply being added to an already full schedule.
Our Kyoto itinerary shows how to give the shrine its own part of a city stay. Before attaching another distant temple, compare the transfer and the remaining energy with the value of sitting down. A clear end to the shrine visit helps the rest of the day work.
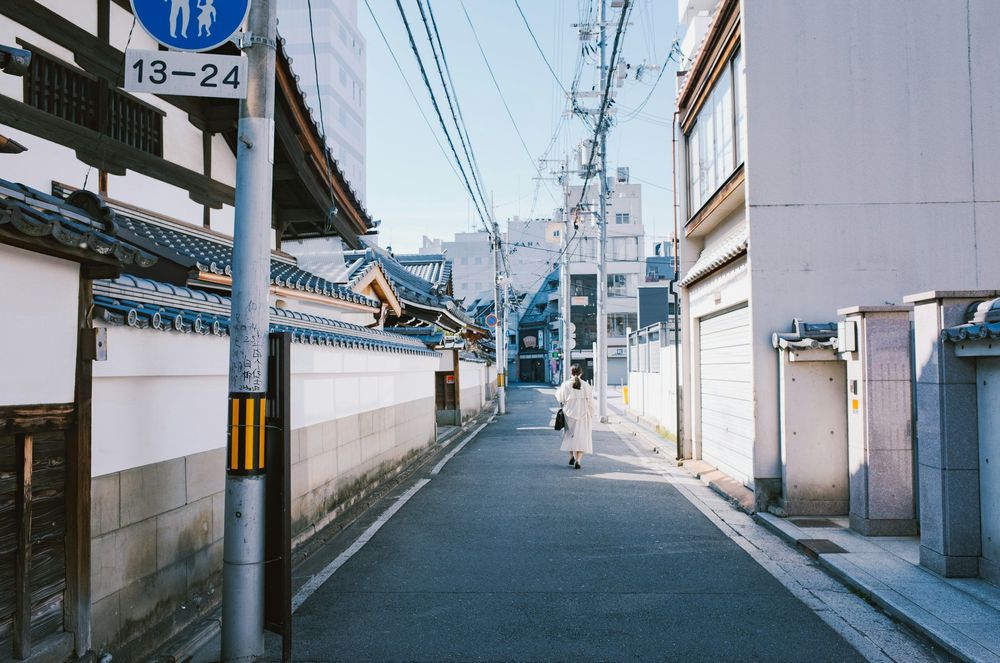
Cover photograph: Destination overview — A person walking along a quiet street with tiled walls in Kyoto. Photo by PJH on Unsplash
Frequently Asked Questions
Do I have to climb Mount Inari to enjoy the shrine?
No. The main precinct and lower torii offer a complete shorter visit. Continue uphill because you want a longer walk, and include the descent in your decision.
Which station should I use for Fushimi Inari?
Compare JR Inari on the Nara Line with Keihan Fushimi-inari. They are different stations; choose according to your starting point and confirm that your train stops there.
Is the lower shrine route automatically step-free?
No. A shorter route can still include steps, slopes and busy passages. Ask about the exact approach and spaces you want to visit if step-free access is essential.
Can I stop anywhere for photographs or food?
Follow the shrine's signs and visitor requests. Keep narrow paths clear, respect photography restrictions and use designated areas for eating and drinking.

Keep Exploring
Mexico City Anthropology Museum: Plan Your Visit
A focused Anthropology Museum visit: compare Mexica, Maya and regional galleries, make room for living cultures and understand practical admission choices.
Asakusa: Senso-ji and a Neighbourhood Walk
Follow the temple approach, understand the difference between Senso-ji and Asakusa Shrine, then choose shopping or a riverside finish.

Bahia Palace: Plan Your Visit in Marrakech
Look closely at Bahia’s painted ceilings, carved plaster and courtyards, then decide whether to add El Badi, the Mellah or a nearby food museum.